The life of Polly

Hi - and welcome to my world - here you'll find all my posts which are about me and what makes me tick. If you follow the links in the side bar you'll discover Polly Laminate - my collage work; Polly Chrome - my photos and other images; Polly Fibrous - everything textile and finally Polly Valent - where you'll find the sketch design challenges and other things I'm passionate about sharing - so put the kettle on and have a look around.

Salut! et bienvenue dans ma monde - ici vous trouverez tous qui parle de moi et ma façon de voir le monde. Si vous suivez les liens sur le côté vous découvrez Polly Laminate - mes collages; Polly Chrome - les photos; Polly Fibrous - tous qui est textile et Polly Valent - ou se trouve les défis de Polly ainsi que les autres sujet qu'il faut partager - donc faîtes couler le café et me rendez visite.

jeudi 25 août 2016

summer project 7 - patchwork pouch - pochette en patchwork - un été cousu 7


Hello – have you got everything you need ready to hand? I hope so, as now you can get stitching! If not, here is the list to recap:


Bonjour – J’espère que vous avez rassemblez tous le matériel, comme ça nous somme prêtes à coudre ! Si non, ne vous inquiétez pas – voici la liste de nouveau avant de commencer :

photo ¨PD


‘Epp flower’ pouch - Materials:

·         Piece of thin card (eg cereal packet) approx. 21cm x 30cm

·         Templates printed onto paper or the thin card

·         Cutter or scissors to cut fabric and card (it is strongly advised to use different tools for the two materials)

·         Two pieces of contrasting fabrics 15cm x 15cm

·         Needle and thread (colour close to fabric)

·         Contrasting thread for pouch (optional)

·         Two pieces of felt 15cm x 25cm (add 5cm seam allowance for other fabric types)

·         Two lengths of ribbon or twine approx. 30cm


Pochette avec motif patchwork  - Matériel :

·         Morceau du carton fin (ex boite de céréale) 21cm x 30cm

·         Modèles imprimés sur du papier ou carton

·         Cutter ou ciseaux pour carton et tissu (d’habitude on n’utilise pas les mêmes outils pour couper les deux matériels)

·         Deux morceaux de tissu contrasté 15cm x 15cm

·         Aiguille et fil (couleur proche du tissu)

·         Fil en couleur contrasté pour la pochette

·         Deux morceaux de feutrine 15cm x 25cm (ajouté 5cm d’ourlet pour autre tissus)

·         Deux longueurs du ruban ou ficelle de 30cm


But first a little explanation – ‘epp’ is short for ‘English paper piecing’ which is the type of patchwork, usually worked by hand, where you first baste your fabric shape around a card form.  Once all your ‘patches’ are prepared you then hand stitch them together.  There are other ways of working, but this is the technique I have used for this project.

photo PD


D’abord un petit explication – il existe plusieurs façons de faire du ‘patchwork’ et celui que j’ai utilisé ici s’appelle en anglais ‘epp’.  C’est une abréviation de ‘English paper piecing’ ou l’emplacement de papiers à l’anglaise si vous voulez.  En vrai ça veut dire que les coupons de tissu sont d’abord bâtis autours des gabarits en carton avant d’être assemblé avec la couture à la main.  C’est alors ce technique ci que je vais utiliser pour ce projet.


Instructions :

PATCHWORK

1.       Download the free template and print onto paper or thin card.

Téléchargez gratuitement le modèle et imprimez-le sur du papier ou carton légère.

photo PD


2.       Very carefully cut out the two larger and seven smaller card templates.  It is very important to do this accurately.
Découpez soigneusement les gabarits en cartons (deux plus grands et sept plus petits)C’est très important d’être précis.
photo PD


3.       Trace the larger hexagon onto the fabric for the centre of the flower.

Tracez le plus grand hexagone sur le tissu pour le centre de la fleur.

photo PD


4.       Repeat with the larger square, tracing six times on the fabric for the petals.

Répétez avec le plus grand carré, faisant six fois le tracé pour créer les pétales. 

photo PD


5.       Cut out the seven fabric pieces, again as accurately as possible. 

Découpez les sept formes de tissu, aussi précisément que possible.

6.       Place the smaller hexagon template in the middle of the hexagon fabric.  Fold over the fabric which is visible beyond the card.

Centrez le plus petit gabarit hexagone sur le tissue.  Pliez le tissu qui dépasse la forme vers le milieu.
photo PD


7.       Baste around the edge of the fabric to hold the shape.  Don’t stitch down the little triangles which form at the corners.

Bâtissez autours les gabarits pour tenir en place le tissu.  Il ne faut pas coudre les petits triangles qui se forme sur les coins.

photo PD


8.       With the right sides of the fabric together, stich one square to each side of the hexagon.  This stitches will be visible, so keep them small and neat.

Avec les endroits ensemble, attaché un carré sur chaque côté de l’hexagone.  La couture sera visible, alors utilisez des petits points, bien nettes

photo PD


9.       Press the flower motif before carefully removing the card templates.

Repassez le motif de fleur avant d’enlever les gabarits avec soigne.

photo PD


POUCH

10.   Position and pin the patchwork on one of the felt pieces.  

Centrez et épinglez le patchwork sur un des deux morceaux de feutrine.


11.   Either by hand or machine stitch the flower on to the felt.  I chose a contrasting colour thread and different stitches to make the design more eye-catching.

Cousez la fleur, soit à la machine ou à la main.  J’ai choisi un fil contrasté avec des points de broderie pour faire un motif attirant.  

photo PD


12.   Fold over 1.5cm at the top of the felt piece.  Stitch along the bottom to form a channel for the drawstring.

Pliez un ourlet de 1,5 cm le long de la feutrine.  Cousez-le pour créer un passage.


13.   Repeat with the second felt piece.

Répétez avec le deuxième morceau de feutrine.

14.   With wrong sides together, stitch along the two sides and bottom to make a pocket.

Avec les envers ensemble, cousez le long des deux côtes et le fond de la feutrine pour faire une pochette.

photo PD


15.   Thread one length of ribbon through the top channel and return through the other side.  Knot the ends of the ribbon.

Passez la ficelle dans le passage avant et rentrez par l’arrière.  Nouez les bouts de la ficelle.
photo PD

16.   Repeat with the other piece, starting from the opposite side.  Your pouch is now ready to hold all those important small things which get swallowed by your handbag!  

Répétez avec le deuxième morceau de la ficelle en commençant par l’autre côté.  Votre pochette est maintenant prête pour contenir tous les articles qui sont normalement avalé par votre sac à main !

photo PD

mardi 23 août 2016

summer stitching week 7 - un été cousu semaine 7


Hello – so after a lovely break, I’m raring to go with our seventh and penultimate project!

This time I wanted to challenge myself as well as you so I set out to learn a new skill.  I have seen so many amazing patchwork and quilted projects recently on social media that I have been itching to have a go.  Much as I would love to complete an amazing art quilt, I know in my heart of hearts that I just don’t have the staying power.  But why not a smaller project?  So, with the help of Debs from Madbird textiles I set about demystifying the world of ‘epp’ and at the same time designed this very simple, project to share with you, and hopefully inspire you to try too.


Bonjour  - après une pause bien mérité, je suis très impatiente de commencer notre septième projet !

Cette fois, je voulais aussi me lancer un défi avec un nouveau compétence à apprendre.  Dernièrement j’ai vu beaucoup de projets de patchwork et de courtepointes magnifiques sur des réseaux sociaux que je voulais absolument essayer moi-même.  Je rêvais de faire une couverture impressionnante, mais au fond du cœur, je savais que je ne la finirai jamais.    Mais pourquoi pas quelque chose plus petit ? Alors, avec l’assistance de Debs de Madbird Textiles, j’ai appris quelques mots clés et en même temps j’ai dessiné ce projet tout à fait abordable.  J’espère que ça va vous inspirer de vous y lancer aussi !   


photo PD


‘Epp flower’ pouch - Materials:

·         Piece of thin card (eg cereal packet) 15cm x 15cm

·         Templates printed onto paper

·         Two pieces of contrasting fabrics 15cm x 15cm

·         Needle and thread (colour close to fabric)

·         Contrasting thread for pouch (optional)

·         Two pieces of felt 15cm x 25cm (add 5cm seam allowance for other fabric types)

·         Two lengths of ribbon or twine approx. 30cm


Pochette avec motif patchwork  - Matériel :

·         Morceau du carton fin (ex boite de céréale) 15cm x 15cm

·         Modèles imprimés sur du papier

·         Deux morceaux de tissu contrasté 15cm x 15cm

·         Aiguille et fil (couleur proche du tissu)

·         Fil en couleur contrasté pour la pochette

·         Deux morceaux de feutrine 15cm x 25cm (ajouté 5cm d’ourlet pour autre tissus)

·         Deux longueurs du ruban ou ficelle de 30cm


So don’t worry if you don’t know your ‘epp’ from your ‘hexie’ I’ll be back on Thursday to explain a few of the common terms as well as with the tutorial for the pouch.

In the meantime, don’t forget to share your other projects on facebook or using #pollydextrous_sews .  Please don’t feel your handiwork doesn’t ‘make the grade’ – we’re here to encourage you to take part, not judge your efforts J


Alors, ne vous inquiétez pas si vous connaissez pas encore le jargon de patchwork, je vous expliquerai jeudi les mots les plus couramment avec bien sûr le tutorial. 

Entretemps, n’oubliez pas de partager vos projets sur facebook ou avec #pollydextrous_sews  .  Il ne faut absolument pas croire que vos efforts ne méritent pas d’être partagé – nous sommes ici pour vous encourager plutôt que juger.  Notre enjeu est de vous faire coudre en s’amusant J

jeudi 11 août 2016

summer project 6 - manhattan skyline - vue sur Manhattan - projet d'été semaine 6


Hello!  Recently I was lucky to visit New York for the first time. An amazing city which has left me with even more creative ideas than normal! One of these was to make a piece of stitched art based on the Manhattan skyline which works perfectly with Made by Mrs M's range of fabrics.
Bonjour! Au printemps j'ai eu l'occasion de passer mon premier séjour à New York.  C'est une ville merveilleuse qui m'a beaucoup impressionné et m'a donné encore plus d'idées créative que d'habitude!  Une de ces idées était de faire un oeuvre cousu basé sur le paysage urbain de l'Isle de Manhattan  qui se marie parfaitement avec les tissu de Made by Mrs M.


Today I’m going to show you how to make this picture based on the architecture of this iconic island.  Although these instructions make up into an A4 sized picture, the design could easily be adapted to make a larger motif for a cushion or repeated to make a lampshade. Please do share your projects with me using #pollydextrous_sews .

Aujourd'hui je vais vous expliquer comment faire un tableau inspiré par l'architecture de cette isle mythique.  Les instructions sont destiner pour faire un image de taille A4, mais le modèle peut être adapter pour décorer une lampe ou coussin par exemple.  J'aimerais bien voir vos propres créations sur #pollydextrous_sews


Materials 

·         1 sheet a4 card, blue

·         Piece of blue / grey tissue paper (approx 1/2 a4)

·         Template printed onto light weight card / thick paper (free download here)

·         Pieces of fabric /paper in various colours (approx. one side A4 in total)  - i have used the following, all available from madebymrsm.co.uk : Windows in yellow, Battersea power station in orange; Park Hill in teal and London Town in pink.

·         Thread and double sided tape or low tack glue

·         Pencil and ruler

Matériels
  • Une feuille A4 de carton bleu
  • Une feuille de papier soie en bleu / gris ( 15cm x 30cm )
  • Modèle imprimé sur du carton / papier épais A4  (à télécharger gratuitement ici)
  • Coupons de tissu / papier (suffisant pour couvrir une surface d'environ 30cm x 21 cm ) J'ai utilisé les tissu suivant de Made by Mrs M : 'Windows' en jaune; 'Battersea power station' orange; 'Park Hill' en bleu canard (teal en anglais) et 'London Town' en rose 
  • Fils de couture et scotch double face
  • Crayon et règle


 The project is intended to be machine stitched but can easily be adapted to be hand sewn or glued if you prefer.

Le projet ici a été cousu sur la machine, mais ça peut se faire aussi avec la couture à la main (je vous conseille de piquer les trous suivant le modèle avant la couture ) ou même collé. 


Instructions

1. Cut the tissue paper to just less than half height of the card. (10cm on a4) Leave a 1cm overhang on the bottom edge as the paper will move a little.  We will trim any overhang at the end of the project.

Découpez le papier soie pour avoir un morceau de 10 cm x 30cm.  Positionnez-le avec un marge de 1 cm en  dessous du carton.  Le papier bougera pendant la couture et nous allons découpez les parties qui se dépassent à la fin du projet.

2. Glue lightly along the top edge to hold in place during sewing.
Collez sur la partie haute pour garder la position pendant la couture.

3. Stitch a straight line along the top
Cousez une ligne droit le long du papier.

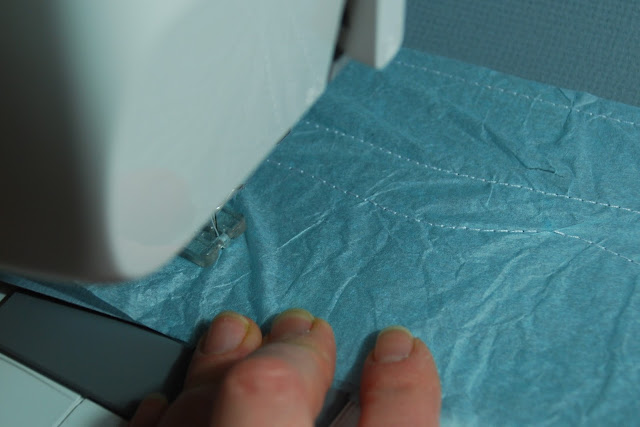
4. Sew using wavy lines to represent water. Work from top to bottom, smoothing the paper out as you work.  Add more lines, working upwards this time.  

En suivant des traits ondulés pour représenter de l'eau, cousez de haut en bas.  Prenez le temps de lisser le papier avec chaque passage. 


5. Pull threads through to the back of the work and fix using double sided tape.  Trim long ends. 

Tirez les fils de couture sur l'envers de votre travail et fixez-les avec du scotch double-face.  Coupez les bouts des fils.


6. The picture has three layers – background; mid ground and foreground. Cut out the background buildings (templates a-d) in fabric, placing the pieces to suggest windows. 

L'image est composé de trois couches - l'arrière plan, le milieu et le premier plan.  Découpez les bâtiments de l'arrière plan (modèles a - d) en tissu.  Essayez de les arranger pour créer l'impression des fenêtres.


7.Draw a faint line 1cm above the top of the 'water'
Dessiner un trait 1cm en dessus de l'eau.

8. Arrange the pieces along the line, using the diagram as a guide and tack in place
Positionnez les morceaux le long du trait, en utilisant le diagramme comme référence.  Collez-les avec le scotch double face.


9. Stitch around the edge of each piece using the diagram to add additional details, shown as dashed lines on the template. Finish as for water stitching .

Cousez autours de chaque morceaux.  Vous pouvez ajouter des détails additionnels au fur et mesure de vos souhaites.  Coupez les fils comme dans l'image 5 ci-dessus. 


10. Cut out the middle ground (templates e-i)

Découpez les motifs du milieu (modèles e - i)


11. Repeat as for background, but align with water.
Positionnez-les au même niveau de l'eau, puis cousez comme pour l'arrière plain.

12. Cut out foreground, this time place slightly overlapping water, stitch in same way.
Découpez le premier plain, et positionnez légèrement en dessous de l'eau.  Cousez dans la même façon.


13.  If you wish add further details such as the Brooklyn Bridge and boats in the foreground.

Si vous souhaitez, vous pouvez ajouter des détails comme le Pont de Brooklyn et des bateau sur l'eau.


14.  Well done! Your picture deserves framing - you should be very proud of your work.  And don't forget to share with us on Facebook or #pollydextrous_sews

Bravo! Votre oeuvre mérite d'être encadré - vous pouvez être très fier de votre travail.  N'oubliez pas de partager vos créations avec nous sur Facebook ou avec #pollydextrous_sews


There will be a break next week as I am on holiday, but see you on the 23rd August for the next project.

Il y aura une petite pause la semaine prochaine car je pars en vacances, mais on se reverra le 23 Août pour notre prochain projet. 


mardi 9 août 2016

summer stitching week 6 - un été cousu semaine 6

Hi there! Hope you've been enjoying the variety of projects we have covered so far.  For this week's challenge we shall be developing the techniques from our stitched card to make a work of art!

Salut! J'espère que nos projets vous ont plus.  Cette semaine nous allons revisiter les techniques de couture rencontrés lors de notre carte de vœux pour  créer un oeuvre artistique!

photo PD


The inspiration for this project was two-fold.  Firstly, earlier in the year,  I was lucky enough to visit New York - the view looking back towards Manhattan from the Statue of Liberty is unforgettable.  Secondly by the fabric designs of Kate Marsden and her brand 'Made by Mrs M' .  I try not to look too much at the work of other designers, but Kate's mid-century inspired ranges appeal very much to my architectural side and they were the perfect basis for my cityscape.

L'inspiration pour ce projet vient de deux éléments.  En premier, au printemps j'ai eu la chance de passer un beau séjour à New York.  La vue de Manhattan à partir de la Statue de la Liberté est inoubliable.  Et second par les tissu crée par Kate Marsden pour sa marque 'Made by Mrs M'.  D'habitude, je ne regarde pas trop les créations des autres designers, mais les motifs de Kate, avec leur look des années 50, attirent ma côté architecturelle et ils allaient parfaitement avec mon paysage urbain.

photo Made by Mrs M


So as previously here is the list of materials you will need - don't panic though, it's not as complicated as it looks.  It would equally be possible to create a similar effect with patterned paper and by gluing the design rather than stitching it.

Voici donc la liste de matériels - n'aie pas peur!  Le projet n'est pas aussi difficile que vous imaginez!  En plus c'est bien possible de créer une version avec du papier imprimé et même en utilisant la colle à la place de la couture. 

Materials 
·         1 sheet a4 card, blue
·         Piece of blue / grey tissue paper (15cm x 30cm)
·         Template printed onto light weight card / thick paper
·         Pieces of fabric /paper in various colours (approx. one side A4 in total)  - i have used the following, all available from madebymrsm.co.uk : Windows in yellow, Battersea power station in orange; Park Hill in teal and London Town in pink.
·         Thread and double sided tape or low tack glue
·         Pencil and ruler

Matériels
  • Une feuille A4 de carton bleu
  • Une feuille de papier soie en bleu / gris ( 15cm x 30cm )
  • Modèle imprimé sur du carton / papier épais A4
  • Coupons de tissu / papier (suffisant pour couvrir une surface d'environ 30cm x 21 cm ) J'ai utilisé les tissu suivant de Made by Mrs M : 'Windows' en jaune; 'Battersea power station' orange; 'Park Hill' en bleu canard (teal en anglais) et 'London Town' en rose 
  • Fils de couture et scotch double face
  • Crayon et règle
photo PD


And here is the project.  See you Thursday!
Et voici le projet.  A jeudi!


jeudi 4 août 2016

summer project 5 - child's play cushion - housse de coussin jeu d'enfant - projet d'été 5


Hello – So today I'm handing over the baton to my two sons who are going to show us how they made their cushions.  I must just add that their fabric was pretty special too as it was printed from their own designs using the Print me Pretty site.  If you have the urge to design your own print do give it a go, it's much easier than you think! 


photo PD

Bonjour – Alors, aujourd'hui je passe le relais à mes deux fils qui vont nous montrer comment ils ont confectionné leur propre coussins.  Il faut aussi ajouté que leur tissu a été crée à partir de leur propre dessins en utilisant le site de Print me Pretty.  Si vous avez rêvé de voir votre motif imprimé - allez-y! C'est beaucoup moins difficile qu'on pense.   
Right, have you got everything you need ready to hand? I hope so, as now you can get stitching! If not, here is the list to recap: 


‘‘Child’s play’ cushion cover  - Materials:

·         Cushion pad or old cushion to recover

·         Fabric ( width of cushion plus 10cm x min 2.5 times length cushion plus 10 cm )

Example: for a 30cm x 30cm cushion, you need 40cm x 85 cm fabric

·         Scissors, tape measure and pencil

·         Thread, pins and needle  (hand or machine sew )


 Donc j’espère que vous avez rassemblez tous le matériel, comme ça nous somme prêtes à coudre ! Si non, ne vous inquiétez pas – voici la liste de nouveau avant de commencer :

‘jeux d’enfant’ housse de coussin  - Matériel :


·         Coussin intérieur ou ancien coussin à recouvrir

·         Tissu (largeur du coussin plus 10cm ; minimum 2,5 fois la longueur du coussin plus 10cm)

Exemple : pour un coussin de 30cm x 30cm, il faut 40cm x 85cm de tissu

·         Ciseaux, mètre et crayon

·         Fils, épingles et aiguille (coudre à la main ou la machine)


Instructions :


1.       Measure and cut your fabric to the desired size to fit your cushion.  

Prenez les mesures de votre coussin, puis découpez votre tissu.


cushion pad - coussin intérieur

fabric - tissu


2.       On the wrong side of the fabric, turn and pin a 2.5cm hem on both of the shorter sides, then stitch in place.

Avec l’envers du tissu vers vous ; tournez et épinglez un ourlet de 2.5cm sur des deux côtés les plus courts et cousez-les en place.


3.       Working from the centre of the fabric, measure to find the fold lines.  These will be half of the width plus 5cm to either side, giving a distance of width plus 10cm between them.

Commençant au milieu du tissu, mesurez une plie de chaque côté.  Le distance entre les deux plies doit égale le largeur plus 10cm.


4. Now fold the fabric , right sides together, to give an overlap of approx. half the width . It is advisable to check this against your cushion pad at this stage so that any necessary adjustments can be made.  The larger the overlap, the better the cover will fit.

Pliez le tissu, avec la côté endroit ensemble, pour achever un chevauchement de à peu près la moitié de la largeur.  C'est fortement conseillé de vérifier maintenant la position du chevauchement avec votre coussin puis réglez-le si nécessaire.  Plus les deux côtés se couvrent, plus la housse gardera sa forme.


photo PD


4.       Pin the fabric along both sides and stitch a 2.5cm hem.

Epinglez-le et cousez une couture de 2.5cm sur les deux côtés.


photo PD


5.       Turn the cover to the right side and insert the cushion pad.

Inversez la housse et insérez le coussin.

photo PD


6.       Place an your favourite chair and be very proud of your work (or failing that have a pillow fight with your brother ;) )

Positionnez sur votre chaise préféré et soit fier de vos travails (ou même faites une bataille de polochons avec votre frère ;) )


As always don't forget to share your work with us and see you next week for another project.

Comme d'habitude, n'oubliez pas de partager vos créations avec nous et à la semaine prochaine pour un prochain projet.

Facebook     Instagram  #pollydextrous_sews