Slightly
later than planned, but here is the final project for this month’s summer
series – a jolly name banner. Of course
this can be personalised to include any name or word you wish, or simply left
blank. However, you will need to decide
on the name or word that you want to feature as this will dictate the number of
flags. Add one flag to either end, plus extra
to separate words.
 |
photo PD
|
Bonjour – un peu plus
tard que planifié, mais voici le dernier projet de notre série d’été – une banderole
personnalisé. Vous pouvez y mettre le
prénom ou mot que vous souhaitez (ou bien le laisser sans lettres) mais il faut
établi combien de triangles il faut pour calculer les matériels – comptez un
pour chaque lettre, plus un sur chaque côté et un pour séparés des mots.
Appliqué bunting- Materials:
·
Templates
printed or traced onto thin card (A4)
·
Thin
white card or drawing paper (A4)
·
pieces
of fabrics ( 12cm x 15cm per flag)
·
pieces
of contrasting felt (15cm x 20cm per flag)
·
Needle
and threads
·
Double
sided tape
·
Length
of ribbon or tape (allow 20cm / flag – for 8 flags I used 1.6m )
The fabrics used in the example are Polly Dextrous: 'poppy'; 'fritillary'; 'toadstool'; 'peacock feathers'; 'gaie paris'; 'stitched script'; 'bonbons' and 'boiled sweets' all available from my Etsy shop
 |
photo PD
|
Banderole appliquée-
Matériel :
·
Modèles
imprimés sur du carton (A4)
·
Carton ou
papier à dessin blanc (A4)
·
Morceaux
de tissu ( par triangle )
·
Morceaux
de feutrine (15cm x 25cm par triangle)
·
Aiguille
et fils
·
Pastilles double-face
·
Ruban ou
ficelle (20cm par triangle – ex. Pour 8 j’ai utilisé 1m60 )
Les tissus utilisé dans ce projet sont Polly Dextrous: 'poppy'; 'fritillary'; 'toadstool'; 'peacock feathers'; 'gaie paris'; 'stitched script'; 'bonbons' and 'boiled sweets' les tous disponible dans ma boutique Etsy
Instructions :
1.
. Download the free template and print onto
paper or thin card.
téléchargez gratuitement le modèle et imprimez-le sur du papier ou
carton légère.
2.
Trace
the larger triangle onto the felt as many times as needed. Cut out the shapes.
Tracez le plus grand triangle sur la feutrine autant de fois qu’il faut. Découpez les formes.
Tracez le plus grand triangle sur la feutrine autant de fois qu’il faut. Découpez les formes.
 |
photo PD
|
3.
Repeat
with the smaller triangle, this time onto the other fabric pieces.
Répétez avec le
plus petit triangle avec les coupons de tissu.
 |
photo PD
|
4. Match the fabric with the felt to create
an eye-catching design.
Mettez les
coupons de tissu avec la feutrine pour créer une combinaison attirant.
 |
photo PD
|
5.
Trace the required letters onto the reverse of the white card. The
letters should be approx. 8cm x 4cm. A similar font is available here. Cut out carefully.
Tracez les
lettres sur le revers du carton blanc.
Utilisez un gabarit de 8cm x 4cm pour réussir des lettres de tailles
uniformes. Une police similaire est disponible ici. Découpez avec soin.
 |
photo PD
|
6.
Arrange
the letters on the triangles to check the suitability of patterns and colours
Posez des
lettres sur des triangles pour vérifier la pertinence des motifs et couleurs.
 |
photo PD
|
7.
Use
the double sided tape to stick the letters in place on the cotton.
Collez les
lettres sur le coton avec les pastilles double face.
8. Sewing really slowly to ensure a
neat finish, stitch each letter in place.
Avec beaucoup
de soin, cousez autour de chaque lettre.
 |
photo PD
|
9. Pull the threads through to the back.
Knot then stick down with tape before cutting the ends.
Tirez les bouts
de fil sur l’envers, nouez-les et collez une pastille sur chaque avant de
découpez ce qui dépasse.
10. Stitch each cotton triangle onto the
corresponding piece of felt taking care to centre the shapes.
Centrez chaque triangle de coton sur son triangle de feutrine, puis
cousez-les en place.
 |
photo PD
|
11. Finish the ends by pulling them
through to the reverse. Knot together
then thread in between the cotton and the felt.
Pull the thread so the fabric wrinkles slightly, then cut the ends,
which will disappear neatly inside the work.
Terminez les
fils sur l’envers du triangle. Nouez-les
ensemble puis passer l’aiguille entre le coton et la feutrine. Tirez le fil jusqu’à le tissu se plie, puis
découpez les bouts. Les fils rentrent à
l’intérieur du travail.
 |
photo PD
|
 |
Photo PD
|
 |
Photo PD
|
12. Starting from the middle of the
ribbon, evenly space the triangles along its length. Make sure to leave min 5cm at each end to
attach the banner.
En commençant
par le milieu du ruban, placez les triangles sur la longueur. Veillez qu’il reste au moins 5cm sur chaque
côté pur faciliter la pose de la banderole.
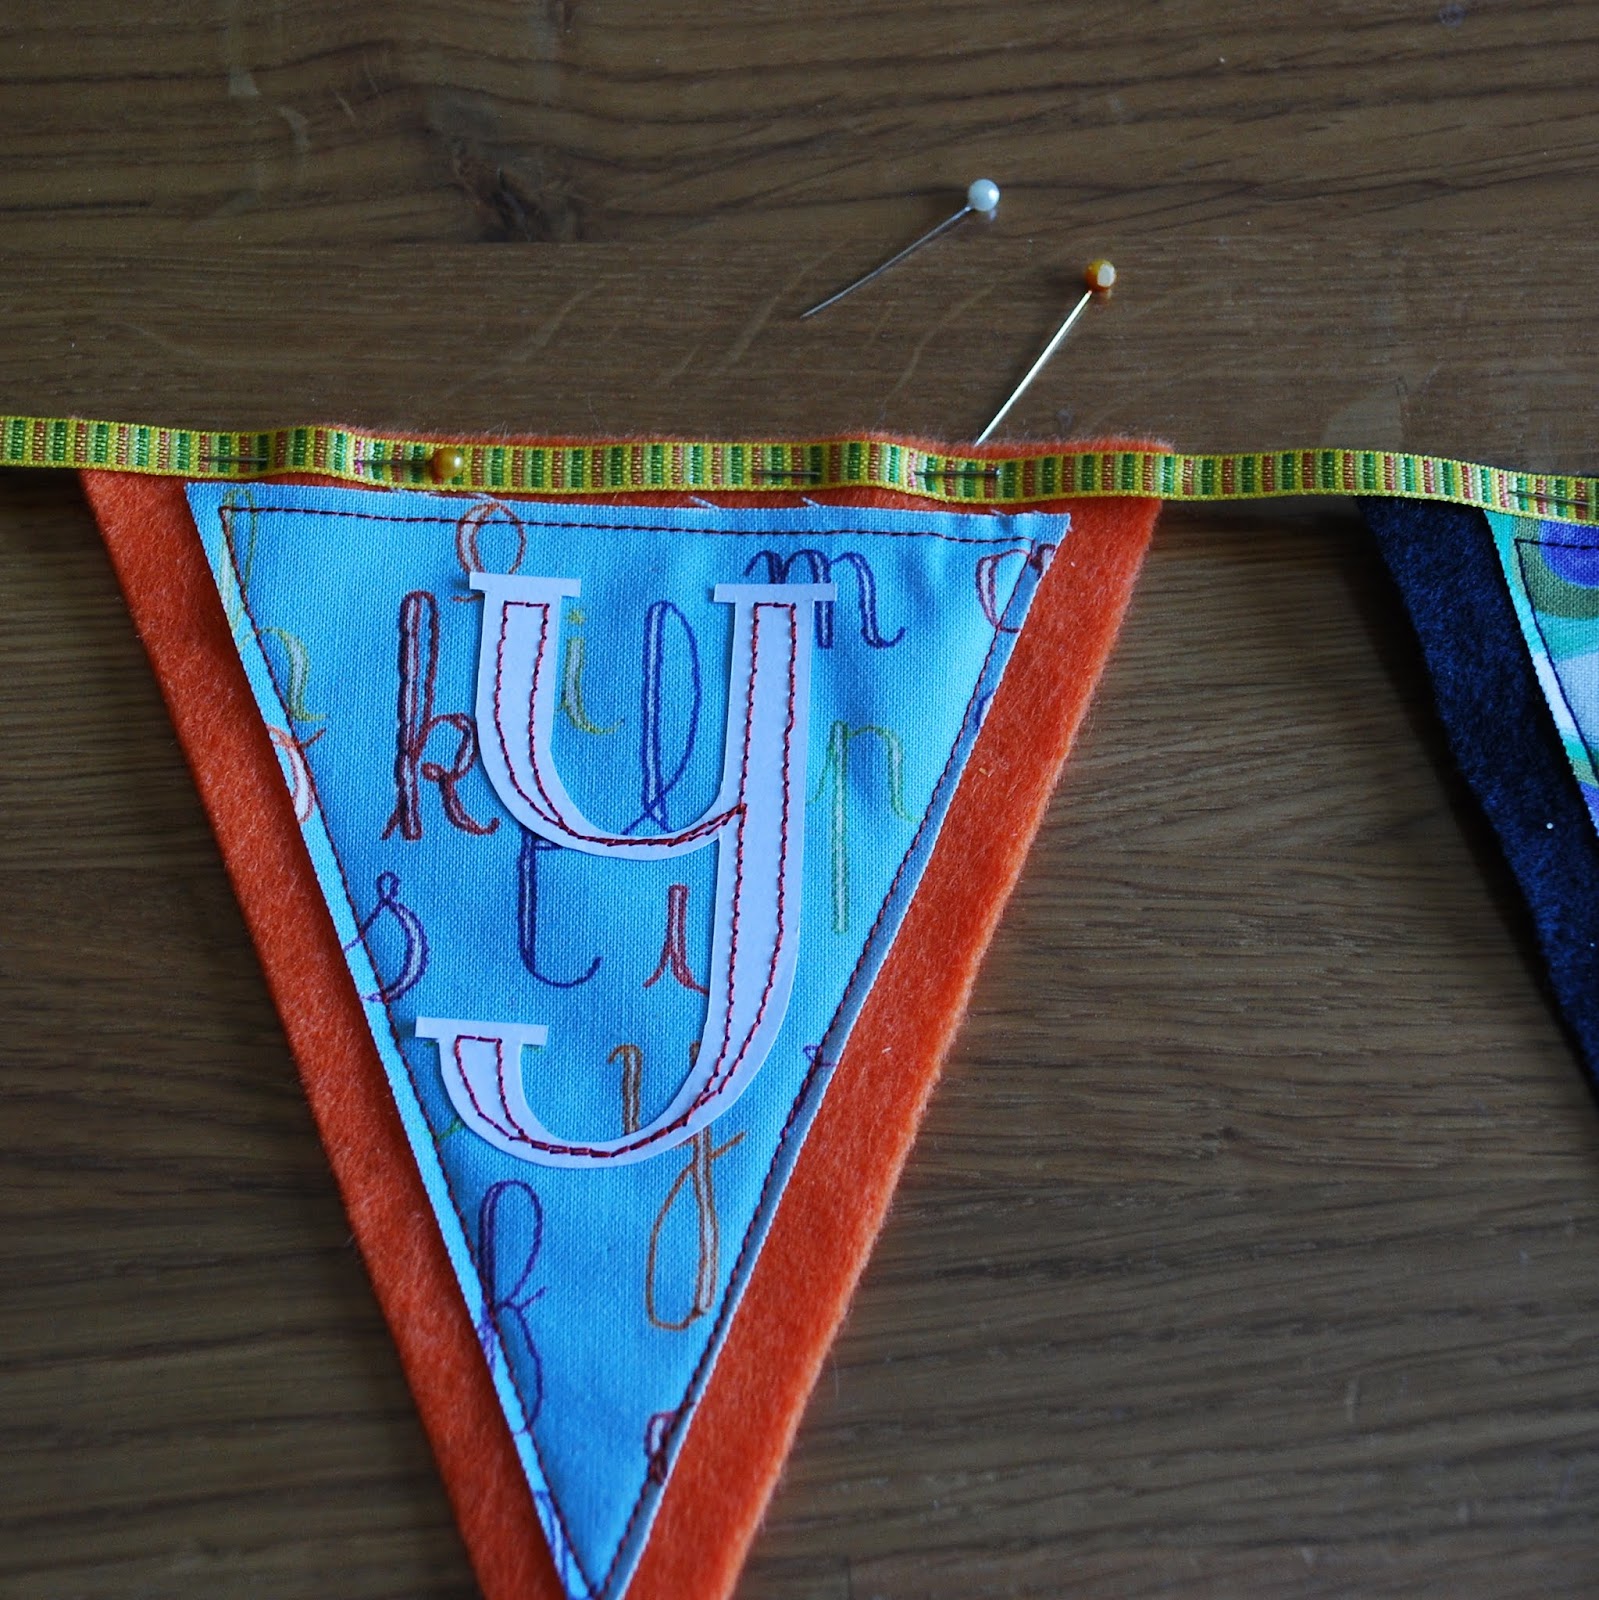 |
photo PD
|
 |
photo PD
|
13.
Hang your banner and admire your handiwork.
Suspendez
votre banderole et admirez votre œuvre !
 |
photo PD
|
So
that brings us to the end of this summer series of stitched projects. I hope you have enjoyed looking at the
projects and hopefully been inspired to try some of them yourselves. If so, don’t
forget to share your creations with us – on facebook, Instagram or twitter
using #pollydextrous_sews There is no time limit so whenever you have a spare
five minutes, get sewing!
Alors, nous
voici donc en fin de notre série d’été cousu.
J’espère que vous avez aimé nos projets.
Si vous avez été inspiré de créer vos propres œuvres, n’oubliez pas de
partager vos créations sur Facebook, Instagram ou Twitter avec
#pollydextrous_sews . Il n’y a pas de
limite de duré, alors dès que vous avez cinq minutes à remplir, allez chercher
vos aiguilles J
Aucun commentaire:
Enregistrer un commentaire